Build a TiDB Cluster in TiDB Cloud (Developer Tier)
This document walks you through the quickest way to get started with TiDB. You will use TiDB Cloud to create a free TiDB cluster, connect to it, and run a sample application on it.
If you need to run TiDB on your local machine, see Starting TiDB Locally.
This document walks you through the quickest way to get started with TiDB Cloud. You will create a free TiDB cluster, connect to it, and run a sample application on it.
Step 1. Create a free cluster
If you do not have a TiDB Cloud account, click TiDB Cloud to sign up for an account.
Sign in with your TiDB Cloud account.
To create a Developer Tier cluster for one year free, you can either select the Developer Tier plan on the plan page or click Create Cluster on the Clusters page.
On the Create Cluster page, set up your cluster name, cloud provider (for now, only AWS is available for Developer Tier), and region (a nearby region is recommended). Then click Create to create your cluster.
The cluster creation process starts and the Security Settings dialog box is displayed.
In the Security Settings dialog box, set the root password and allowed IP addresses to connect to your cluster, and then click Apply.
Your TiDB Cloud cluster will be created in approximately 5 to 15 minutes.
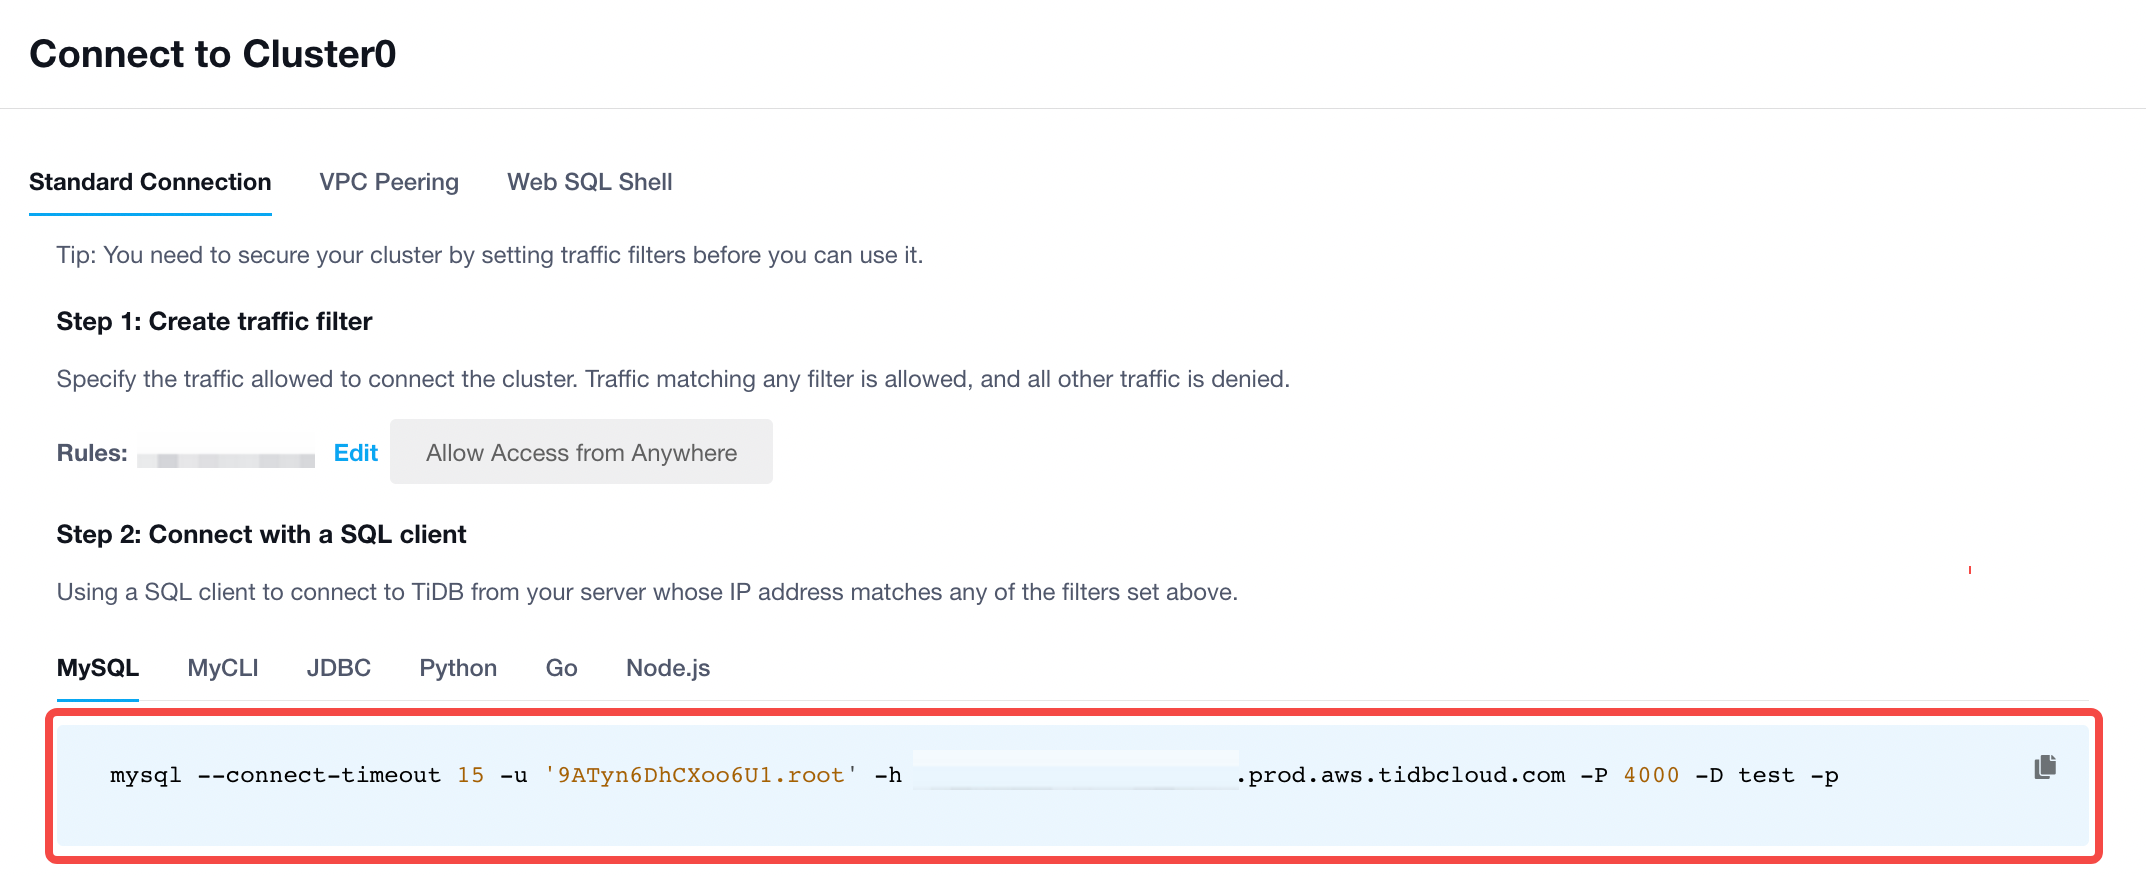
After creating a cluster, click Connect in the upper-right corner. A connection dialog box is displayed.
In the dialog box, locate Step 2: Connect with a SQL client, and then copy the string to connect with a SQL client for later use.
Step 2. Connect to a cluster
- If the MySQL client is not installed, select your operating system and follow the steps below to install it.
- macOS
- Linux
For macOS, install Homebrew if you do not have it, and then run the following command to install the MySQL client:
brew install mysql-client
The output is as follows:
mysql-client is keg-only, which means it was not symlinked into /opt/homebrew,
because it conflicts with mysql (which contains client libraries).

If you need to have mysql-client first in your PATH, run:
  echo 'export PATH="/opt/homebrew/opt/mysql-client/bin:$PATH"' >> ~/.zshrc

For compilers to find mysql-client you may need to set:
  export LDFLAGS="-L/opt/homebrew/opt/mysql-client/lib"
  export CPPFLAGS="-I/opt/homebrew/opt/mysql-client/include"
To add the MySQL client to your PATH, locate the following command in the above output (if your output is inconsistent with the above output in the document, use the corresponding command in your output instead) and run it:
echo 'export PATH="/opt/homebrew/opt/mysql-client/bin:$PATH"' >> ~/.zshrc
Then, declare the global environment variable by the source command and verify that the MySQL client is installed successfully:
source ~/.zshrc
mysql --version
An example of the expected output:
mysql Ver 8.0.28 for macos12.0 on arm64 (Homebrew)
For Linux, the following takes CentOS 7 as an example:
yum install mysql
Then, verify that the MySQL client is installed successfully:
mysql --version
An example of the expected output:
mysql Ver 15.1 Distrib 5.5.68-MariaDB, for Linux (x86_64) using readline 5.1
Run the connection string obtained in Step 1.
mysql --connect-timeout 15 -u '<prefix>.root' -h <host> -P 4000 -pFill in the password to sign in.
Step 3. Run the sample application
Clone the
tidb-example-javaproject:git clone https://github.com/pingcap-inc/tidb-example-java.gitChange connection parameters.
In
plain-java-jdbc/src/main/java/com/pingcap/JDBCExample.java, modify the parameters of the host, port, user, and password:mysqlDataSource.setServerName("localhost"); mysqlDataSource.setPortNumber(4000); mysqlDataSource.setDatabaseName("test"); mysqlDataSource.setUser("root"); mysqlDataSource.setPassword("");Suppose that the password you set is
123456and the connection string you get from TiDB Cloud is the following:mysql --connect-timeout 15 -u '9ATyn6DhCXoo6U1.root' -h xxx.tidbcloud.com -P 4000 -D test -pIn this case, you can modify the parameters as follows:
mysqlDataSource.setServerName("xxx.tidbcloud.com");
mysqlDataSource.setPortNumber(4000);
mysqlDataSource.setDatabaseName("test");
mysqlDataSource.setUser("9ATyn6DhCXoo6U1.root");
mysqlDataSource.setPassword("123456");
Run
make plain-java-jdbc.Here is an example of the expected output.